
How to Prepare for a Headshot Photoshoot
Getting a new headshot can feel like a big deal, and honestly, it is. It's often the first impression people have of you online, whether it's for your job, your brand, or just a professional profile. I know I've felt that pressure before, wanting the photo to be just right. Over the years, I've learned a few things about how to prepare for a headshot session that make a difference. It’s not just about showing up; it’s about being ready. I want to share some of my best tips so you can feel confident and get a shot you'll like.
Define the Purpose of Your Headshot: Corporate, Creative, or Personal Branding
Before you even think about what to wear or how to style your hair, it’s important to figure out why you need this headshot in the first place. The purpose dictates everything else. Are you looking for something super formal for a corporate directory, or is it more for your personal website, where you want to show off your creative side? Knowing this will help guide all the other decisions we’ll make.
Think about where this photo will primarily be seen. If it’s for a company website or a professional networking site like LinkedIn, a more traditional, polished look is usually best. This often means solid, neutral colors and a straightforward pose. On the other hand, if you’re an artist, musician, or entrepreneur who relies heavily on personal branding, you might want something that shows more personality and flair. This could involve more dynamic poses, unique wardrobe choices, or even a background that reflects your work.
Corporate Headshots
These are typically for traditional business environments. The goal is to convey professionalism, trustworthiness, and approachability. Think clean backgrounds, conservative attire, and a friendly, confident expression. The focus is on presenting a solid, reliable image for your company.
Creative Headshots
If you're in a field like acting, modeling, or the arts, your headshot needs to showcase your range and personality. You might opt for more varied expressions, different outfits, and perhaps even a more artistic or unconventional background. The aim here is to capture your unique essence and what makes you stand out.
Personal Branding Headshots
This category is a bit broader and often blends elements of both corporate and creative. It’s about showing who you are as an individual and how you connect with your audience. Your headshot should align with your overall brand message. For example, a life coach might want a headshot that feels warm and inviting, while a tech startup founder might prefer something modern and forward-thinking. It’s about telling your story visually. You can explore personal branding photography to get a better sense of how this works.
Understanding the intended use of your headshot is the very first step in ensuring the final image effectively represents you and your professional goals. It sets the stage for all subsequent planning, from wardrobe to location.
Research and Select the Right Headshot Photographer
Finding the right photographer is a big step in getting a headshot that works for you. It’s not just about finding someone with a camera; it’s about finding someone whose style matches what you need and who makes you feel comfortable. I always start by looking at portfolios. Do their past headshots look natural? Are the people in them engaging? I want to see that the photographer can capture a genuine expression, not just a stiff pose. It’s also important to check if they specialize in headshots. You wouldn’t go to a wedding photographer for newborn pictures, right? The same applies here; you want someone who has honed their skills specifically for headshots.

Reading reviews is another key part of my process. I look for feedback on things like professionalism, response time, and whether clients felt happy with the final images. A photographer who gets back to you quickly and has consistently good reviews is usually a good sign. It’s also helpful to have a conversation before booking, even a quick phone call. This helps build a bit of trust and lets me explain what I’m looking for. It’s like getting to know them a little, so you’re not a total stranger when you get in front of the camera. This rapport can make a big difference in how relaxed you feel, and that shows in the photos.
Considering Pricing and Packages
The goal is to find a photographer whose work you admire and who makes you feel at ease. This combination is what leads to truly effective headshots that represent you well.
Schedule a Pre-Session Consultation to Align Expectations
Before you even think about stepping in front of the camera, it’s a really good idea to have a chat with your photographer. This pre-session consultation is where you and the photographer get on the same page about what you want to achieve with your headshots. It’s not just about picking a date and time; it’s about aligning expectations so that you both know what to aim for.
Discuss Your Vision and Goals
This is your chance to explain what you want your headshot to say about you. Are you going for a corporate look, something more creative, or perhaps a personal brand image? Talk about the overall feeling you want to convey. For instance, if you're updating your LinkedIn profile, you might want a more professional and approachable look. If it's for a creative portfolio, you might want something a bit more edgy. Communicating your objectives helps the photographer understand your needs.
Plan Wardrobe and Backgrounds
Bring some of your clothing options to the consultation, or at least discuss them. The photographer can offer advice on what colors and styles work best for headshots and complement the background they have in mind. They might also have suggestions for backgrounds that will make your chosen outfits pop. It’s helpful to have a general idea of the color palette you’re considering for both your clothes and the backdrop.
Ask About the Photographer's Style and Process
Every photographer has a unique style and workflow. Use this time to ask about their approach to lighting, posing, and editing. Understanding their process can help ease any anxieties you might have and give you a clearer picture of what to expect on the day of the shoot. You can also ask for recommendations on products that might help with common issues, like skin preparation. It’s also a good time to confirm details like the session length and what you should bring with you. You can find some great tips on selecting a photographer that’s a good match for you on photography websites.
It's important to remember that the photographer is there to help you look your best. Be open to their suggestions and feedback, as they have experience in what works well for headshots. They might have ideas you hadn't considered that could make your photos even better.
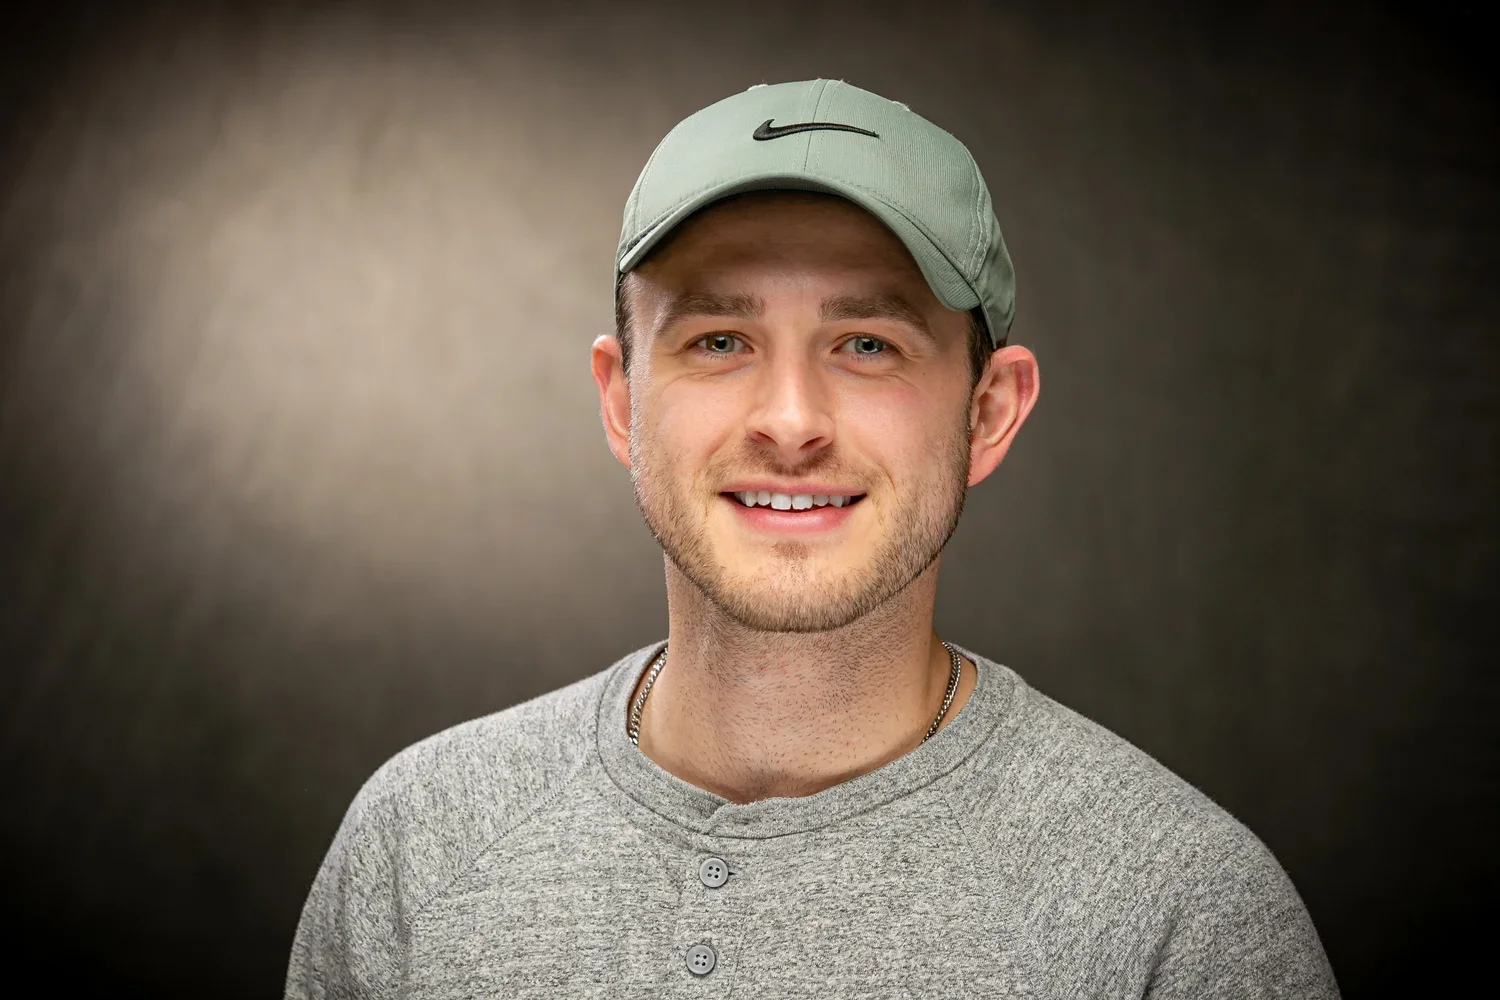
Plan Your Wardrobe
When it comes to planning your wardrobe for a headshot session, the goal is to select outfits that make you look your best without being distracting. Solid, flattering colors are generally the safest and most effective choice. They help keep the focus squarely on your face and expression, which is the whole point of a headshot.
Think about the message you want to convey. Darker colors can project a sense of authority and seriousness, while lighter shades often come across as more approachable and friendly. If your industry or personal brand calls for it, a pop of color can inject energy and confidence, but it's best to use these as accents or ensure they complement your skin tone. For instance, if you're in a creative field, a bolder color might be appropriate, but for a more corporate setting, sticking to neutrals or muted tones is usually the way to go. It's also a good idea to consider how your outfit will look against the chosen background. Generally, a bit of contrast between your clothing and the background works well to make you stand out.
Here are some general guidelines to consider:
Color Palette: Stick to solid colors. Avoid busy patterns, as they can be distracting and may even create a moiré effect on camera. If you do opt for a pattern, make sure it's very subtle and doesn't overpower your face.
Fit and Silhouette: Ensure your clothing fits well. Avoid anything too baggy or too tight. Tailored pieces tend to look more polished. Creating a bit of space between your arms and your body can help define your silhouette, so consider outfits that allow for this, perhaps with sleeves that aren't too tight or jackets with pockets.
Necklines: Higher necklines are generally recommended for headshots. They tend to be more flattering and professional. Low-cut tops or very high turtlenecks can sometimes be distracting.
It's always a good idea to bring a few options with you to the shoot. This way, you and your photographer can decide together what looks best on camera. Having layers, like a jacket or cardigan, can also add variety to your shots without requiring a full outfit change.
Remember to iron your clothes and ensure there are no wrinkles. Also, pay attention to details like collars and cuffs – they should lie flat and look neat. If you wear glasses, make sure they are clean and free of smudges. For a more polished look, consider coordinating your outfit with your personal coloring to ensure the colors enhance your features rather than competing with them.
Coordinate Hair and Makeup for a Polished Look
Getting your hair and makeup right for a headshot session is pretty important. It's not about transforming yourself into someone else, but rather about presenting the best, most polished version of yourself. Think of it as a subtle enhancement, not a complete overhaul.
Hair
Cleanliness is Key: Make sure your hair is clean. Greasy hair shows up in photos, and it's hard to fix later. If you're coloring your hair, try to do it at least a week before the shoot. This gives it time to settle and look more natural, avoiding any harsh lines around your face.
Styling: If you have a specific style in mind, it's a good idea to get a professional blowout or have a stylist help you achieve the look. Avoid trying out new hairstyles right before the shoot; stick with what you know works for you. If you're planning on multiple looks, starting with your hair down and then styling it up can be a good strategy.
Facial Hair: For men, if you have facial hair, make sure it's neatly trimmed or cleanly shaved. If you plan to shave on the day of the shoot, consider bringing your shaving supplies so you can do it between looks if you want to compare the two styles.
Makeup
Keep it Natural: The goal is to look like yourself, just a bit more put-together. Avoid heavy makeup, excessive highlighter, or anything too shiny, as these can reflect light in unflattering ways. A matte finish usually works best.
Professional Help: If you're unsure about makeup, hiring a professional makeup artist is a great idea. They know how to create a look that photographs well. Many photographers have artists they work with, so it's worth asking about that option.
Touch-ups: It's a good idea to bring some blotting papers or powder for touch-ups during the session, especially if you tend to get shiny. This helps maintain a fresh look throughout the shoot.
Remember, the aim is to look like the best version of yourself. If you're worried about shine or stray hairs, don't stress too much. Most minor issues can be addressed during the post-production editing process, but starting with a solid base makes everyone's job easier.
Practice Posing and Facial Expressions Ahead of Time
It might sound a little silly, but practicing your poses and facial expressions in front of a mirror before your headshot session can make a world of difference. Think about it – you want to look natural and confident, not stiff or awkward. I find that looking at past photos of myself that I liked helps me figure out what works. Was I smiling with my eyes? Was my head tilted just so? Jotting down a few ideas or even taking some quick phone snaps can be super helpful.
Practice Different Angles
Don't just stand there straight on. Try turning your shoulders slightly, tilting your head, or leaning in a bit. It's amazing how much a subtle shift can change the feel of a photo. I always try to remember to push my chin forward and slightly down; it helps avoid any unflattering angles.
Experiment with Expressions
Beyond just a smile, think about conveying different emotions or attitudes. A slight smirk, a thoughtful look, or a genuine laugh can all tell a different story. The goal is to look approachable and authentic. It's worth spending some time in front of the mirror to see what feels natural and looks good on you. Remember to focus on your eyes; they're often the first thing people notice.
Get Comfortable with Your Photographer
While you're practicing at home, also think about how you'll interact with your photographer. Being relaxed and trusting them is key. If you can, chat with them beforehand to get a feel for their style. This can help ease any nerves on the day of the shoot. It's also a good idea to have a few reference photos of poses you like to show them, like those from a previous successful headshot.
Remember, the camera captures what you project. If you feel good and confident, that will show in the final images. Don't be afraid to try different things; the more comfortable you are, the better the results will be.
Prepare Your Skin
Your skin is the canvas for your headshot, so giving it some attention beforehand really makes a difference. I always aim to be well-rested and hydrated in the days leading up to a shoot. It sounds simple, but it genuinely helps you look more awake and vibrant. Think of it as a little self-care that pays off in the final images.
Hydration is Key
Drinking plenty of water is probably the most straightforward tip. It helps your skin look plumper and can reduce the appearance of fine lines. I try to increase my water intake a few days before the session, not just the day of. It’s also a good idea to cut back on salty foods and alcohol, as they can make your skin look puffy or tired. I’ve found that avoiding these things a couple of days prior really helps my complexion.
Prioritize Sleep
Getting enough sleep is another big one. While editing can help with things like under-eye circles, nothing beats being genuinely rested. I aim for at least 7-8 hours of sleep for a few nights before the shoot. If I’m particularly stressed or haven’t slept well, I notice it shows in my photos, no matter how good the lighting is. It’s better to reschedule if you’re feeling run down, rather than pushing through a session when you’re not feeling your best. Remember, you can always adjust your actor headshot session if needed.
Skin Care Routine Adjustments
Avoid new products: Stick to your regular skincare routine. Introducing new products right before a shoot can sometimes cause unexpected reactions.
Gentle exfoliation: If you exfoliate, do it a few days before, not the day of. This helps prevent redness.
Moisturize wisely: If your skin tends to be dry, moisturize in the days leading up to the shoot. On the day of, if you’re not wearing makeup, a splash of cold water and patting dry is usually enough. If you are wearing makeup, a light powder can help control shine without looking heavy.
Taking care of your skin is about more than just appearance; it's about feeling confident and comfortable. When you feel good, it shows. So, give yourself a little extra attention, and you'll likely be happier with the results.
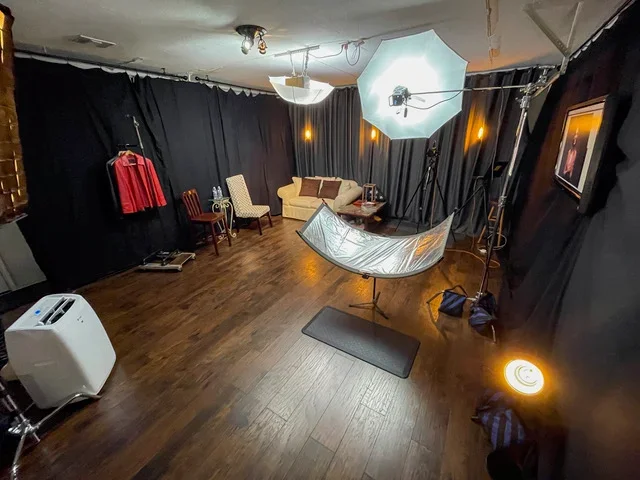
Choose the Right Location and Background for Your Headshot
When thinking about how to prepare for a headshot photoshoot, the location and background are really important. They set the tone for your entire image. I always advise clients to consider what message they want to send. Are you going for a corporate, serious vibe, or something more creative and approachable? The background should support this, not compete with it.
Background Considerations
Solid, Neutral Colors: These are generally the safest bet for a professional look. Think soft grays, whites, or muted blues. They keep the focus squarely on you. I find that a simple, uncluttered background makes a person stand out.
Environmental Settings: Sometimes, a subtle environmental background can add personality. This could be a softly blurred cityscape, a hint of nature, or even a clean office space. The key here is that it remains out of focus, so it doesn't distract from your face. If you're unsure, it's always better to err on the side of simplicity.
Color Coordination: Make sure your outfit doesn't blend too much with the background. If you're wearing a blue shirt, a bright blue background might not be the best choice. We want a nice contrast that makes you pop.
Lighting and Location Synergy
The interplay between your chosen location and the available light is paramount. While I often recommend seeking out soft, natural light, the location itself can influence this. For instance, shooting near a large window indoors provides excellent diffused light. Outdoors, a shady spot under a tree can offer beautiful, even illumination without harsh shadows. Avoid direct midday sun, as it can be quite unforgiving. If a specific location doesn't have ideal lighting, we might need to bring in some portable lighting equipment to compensate. It’s all about creating a flattering and professional look, and the right setting is a big part of that. Remember to check out some tips on professional headshots for more ideas.
Choosing a background that complements your brand and profession is key. It's not just about looking good; it's about conveying the right impression to potential clients or employers. Think about where you'll be using these headshots – your website, LinkedIn profile, or company directory – and select a background that fits those contexts.
Understand Lighting
Lighting is a really big deal for headshots. It’s what shapes your face and can make you look more or less approachable. My personal preference is to use soft, natural light whenever possible. It just has a way of making skin look good and eyes appear bright, which is exactly what we want for a professional photo. Think about standing near a window, but not in direct sunlight. The light should be spread out and gentle. If you’re shooting outdoors, find a shady spot. This avoids those harsh shadows that can make you look tired or create unflattering lines.
Using Natural Light Indoors
When you’re inside, a large window is your best friend. Face towards it so the light falls evenly on your face. If the light is too strong, you can use a sheer curtain or even a piece of white paper to diffuse it. This softens the light and prevents harshness. It’s all about creating a gentle glow.
Using Natural Light Outdoors
For outdoor shoots, the best time is usually early morning or late afternoon. The sun is lower in the sky then, and the light is much softer. Avoid the midday sun, which is very harsh. If you have to shoot when the sun is high, find a spot with open shade. This means you’re not in direct sun, but the light is still bright and even. Having the sun behind you can also work, but be careful not to create a silhouette.
When Artificial Light is Necessary
Sometimes, natural light just isn’t an option. If you have to use artificial lights, try to mimic natural light as much as possible. Bounce the light off a wall or ceiling using a white surface. This will soften the light and make it less direct. The goal is to make the light look as natural and flattering as possible. If you’re unsure, it’s often best to consult with a professional photographer who knows how to work with different lighting setups. You can find some great tips on professional headshot preparation that touch on lighting as well.
Bring Essential Accessories and Props Thoughtfully
When I prepare for a headshot session, I always think about what I can bring to make the photos more interesting, but also how to keep the focus on me. It's a bit of a balancing act.
Jewelry and Accessories
I usually bring a few options for jewelry. Simple earrings or a delicate necklace can add a nice touch without being distracting. I try to avoid anything too large or flashy, as it can pull attention away from my face. If I'm wearing glasses, I make sure they're clean and, if possible, have anti-reflective lenses. Sometimes, I'll bring a pair without lenses just in case glare becomes an issue. It’s good to have choices, you know?
Props for Storytelling
Props can be great for showing what I do or adding a personal element. For instance, if I'm a writer, I might bring a notebook and a pen. If I work with technology, maybe my phone or a sleek laptop. The key is to keep them relevant to my profession or brand. I saw a photographer bring her camera, which made perfect sense. It’s about telling a story visually, and props help with that. I usually pick one or two items that really speak to my work.
Wardrobe Options
While this section is about accessories and props, I can't help but mention bringing a few outfit changes. It’s always better to have more options than not enough. I usually pack a mix of casual, business casual, and maybe something a bit more formal, just in case the vibe shifts or I want a different look. It’s helpful to have these ready to go, and I’ve found that discussing what to wear for a headshot with my photographer beforehand is a good idea.
It’s important to remember that the goal is to highlight your personality and professionalism. Accessories and props should complement, not compete, with your face and expression. Think about what truly represents you and your work, and choose items that enhance that message.
Communicate Clearly with Your Photographer During the Session
Once you're in front of the camera, remember that open communication with your photographer is key. Don't be afraid to speak up if something feels off. Your comfort and confidence directly impact the final image.
It's a good idea to check in with your photographer about how the shots are looking. Many photographers are happy to show you previews on their camera or a tablet as you go. This allows you to see what's working and what might need a slight adjustment, like a stray hair or a less-than-ideal expression. It helps build trust and ensures you're both on the same page.
Voice any concerns: If your hair isn't sitting right, or you feel a particular pose is awkward, mention it. A good photographer wants you to be happy with the results.
Ask for direction: If you're unsure about what to do with your hands or how to angle your face, ask for specific guidance.
Provide feedback: If you see a shot you like, let your photographer know. This positive reinforcement can help them understand what expressions and poses you prefer.
Remember that your photographer is there to help you look your best. They have the technical skills and artistic eye, but you know yourself best. A collaborative approach usually leads to the most authentic and effective headshots.
It's important to remember that the photographer's goal is to capture your best self. They are trained to see things you might miss, like subtle lighting changes or the way your clothing drapes. Trust their expertise, but also feel empowered to share your thoughts. This partnership is what creates a truly successful headshot, whether it's for a professional doctor headshot or any other purpose.
If you're concerned about specific features, like glasses, make sure to mention them. For instance, dirty glasses can be distracting, and transition lenses might appear dark in photos. It's also wise to avoid activities that might cause skin irritation or breakouts right before your session, as even minor issues can affect your confidence. If you have facial hair, ensure it's neatly trimmed, but avoid shaving immediately beforehand to prevent razor bumps. Checking your hair and face for shine just before the shoot can also make a big difference.
Review and Select the Best Shots Collaboratively
After the camera stops clicking, the real work of choosing the perfect headshot begins. This isn't a solo mission; it's a partnership between you and your photographer. We'll go through the images together, side-by-side, so you can see what we captured. It’s important to remember that what looks good on the camera's small screen might not translate the same way when viewed larger. My goal is to help you identify the shots that not only look good but also convey the right message for your professional needs.
We’ll look for a few key things:
Expression: Does your smile feel genuine? Is your gaze direct and confident?
Pose: Are you standing or sitting comfortably? Does the pose feel natural?
Lighting: Is the light flattering, highlighting your features without harsh shadows?
Background: Does the background complement you without being distracting?
Sometimes, a shot that seems okay at first glance might have a subtle distraction, like a stray hair or a slight squint. By reviewing together, we can catch these details. If there's a photo you like, we can discuss why it works and try to replicate that feeling in subsequent shots. This collaborative process helps build confidence and ensures you're happy with the final selection. It’s also a good time to discuss any specific edits you might have in mind, like minor skin smoothing or background adjustments, to make sure the final image aligns with your vision for your professional branding. This is a great step for anyone preparing for their therapist website photos.
It’s easy to get caught up in minor imperfections, but we’ll focus on the overall impact. The best headshot is one that makes you look and feel your best, ready to make a great first impression.
Plan for Post-Production
Once the camera clicks have stopped, the work isn't quite done. Understanding what happens next, specifically with retouching and final edits, is key to getting the headshot you really want. It’s not about creating a fake version of yourself, but rather about refining the image to look its absolute best. Think of it as the digital equivalent of getting a good haircut or a nice polish on your shoes – it just makes everything look cleaner and more professional.
What to Expect from Retouching
Photographers usually offer a certain level of retouching. This typically includes things like:
Color correction: Making sure the white balance is right and colors look natural.
Exposure adjustments: Brightening or darkening areas to make them look balanced.
Minor blemish removal: Taking care of temporary things like a zit or a stray hair.
Stray hair cleanup: Removing those little flyaways that never seem to stay put.
Understanding the Limits of Retouching
It's important to have realistic expectations. Most professional headshot retouching aims for a natural look. They won't drastically change your features or remove permanent marks like moles or scars unless specifically requested and agreed upon. The goal is to present the best version of you, not a different person.
Collaborative Selection Process
Often, you'll be presented with a gallery of images to choose from. Take your time with this. Look at how you feel in each shot, not just how you look. Sometimes, a slightly imperfect shot where you have a genuine smile is better than a technically perfect one where you look stiff. If you're unsure, ask a trusted friend or colleague for their opinion. Getting feedback can be helpful when you're trying to pick the perfect image from a selection of great ones. Remember, you can always bring multiple outfits to your shoot to get a variety of looks, which means more options to choose from later.
Discussing Advanced Edits
If you have specific concerns, like significant skin texture you'd like softened or a particular worry about eye bags from a sleepless night, discuss this with your photographer before the shoot if possible, or certainly when you're selecting your final images. Some photographers offer different retouching packages. Knowing what's included and what costs extra will help avoid surprises. It’s always good to be clear about what you're hoping for in the final product, so you both end up happy with the results.
After your photos are taken, the next step is making them look their best. This involves touching them up and doing final edits. Think of it like polishing a gem to make it shine. Want to see how we make our photos look amazing? Visit our website to learn more about our editing process.
Frequently Asked Questions
What Should I Wear for My Headshot Session?
I suggest picking clothes that fit well and look good on you. Solid colors usually work best because they don't distract from your face. It's also a good idea to bring a few different outfits so I have options to choose from. Think about what you want your headshot to say about you and your brand.
How Much Sleep Should I Get Before My Headshot?
Getting enough sleep the night before is really important. Aim for at least 7 to 8 hours. This helps reduce dark circles under your eyes and makes you look more rested and refreshed. If you're worried about sleep, don't stress too much; some minor touch-ups can be done later.
Should I Get Professional Hair and Makeup Done for My Headshot?
Yes, I highly recommend professional hair and makeup, especially for women. A makeup artist can help you achieve a polished and natural look that photographs well. For men, makeup is usually not needed, but a little bit of powder to reduce shine can be helpful.
When Should I Get My Hair Cut or Colored Before the Shoot?
It's best to get a haircut about a week before your session. This gives your hair time to settle and avoids any harsh lines from a very recent cut. If you color your hair, do it a few days before so it looks natural and not freshly dyed.
How Many Outfits Should I Bring to My Headshot Session?
I suggest bringing a few different outfits. This gives us more variety and ensures we find the perfect look. Consider bringing something casual, something business casual, and something more formal. Also, bring accessories like jewelry or glasses if you normally wear them.
How Can I Communicate My Preferences to the Photographer?
I encourage you to communicate with me about what you like and don't like. If you have photos of yourself from the past that you liked, bring them along! We can discuss your preferences for poses, expressions, and overall style before and during the shoot.
Should I Practice Posing and Expressions Before the Shoot?
Yes, it's a great idea to practice your poses and facial expressions in front of a mirror. Think about what expressions convey confidence, approachability, and professionalism. Practicing helps you feel more comfortable and natural in front of the camera.
What Is the Overall Goal for My Headshot?
The main goal is to look like yourself, but the best version. We want your headshot to be authentic. While I can do some editing to smooth things out, the best results come from feeling relaxed and prepared. The aim is a natural, confident look.