
2 Light Setup for Headshots for Professional Studio Looks
Getting professional-looking headshots doesn't always mean you need a whole studio full of lights. Sometimes, just two lights can make a huge difference, giving your photos that polished, studio-quality feel. This setup is great because it’s flexible and can be adjusted to suit different faces and styles. A 2 light setup for headshots offers a good balance of control and simplicity for professional results. We'll walk through how to use a 2 light setup for headshots to get results that look like they came straight from a pro studio, without all the fuss.
Why a 2 Light Setup for Headshots Creates Professional Studio Results
So, you're looking to get those polished, professional headshots that make you stand out? A two-light setup is a fantastic way to achieve that studio look without needing a whole crew of lights. It’s a sweet spot between the simplicity of one light and the complexity of more. This setup gives you enough control to sculpt the light and create dimension, making your subject look their absolute best.
Think about it: one light is great, but it can sometimes leave you with flat images or harsh shadows if not handled carefully. Adding a second light, often called a fill or a kicker light, lets you balance those shadows, add separation, and give the portrait a more three-dimensional feel. It’s like having a main light to define the face and a secondary light to gently lift the shadows or add a subtle highlight to the hair or jawline.
Here’s why it works so well:
Control over Shadows: You can soften or eliminate unwanted shadows, giving a cleaner look.
Adding Dimension: A second light can create subtle highlights that define facial features and hair.
Subject Separation: It helps separate the subject from the background, making it pop.
Versatility: You can adjust the intensity and position of each light to create different moods and looks.
Using two lights allows for a more nuanced approach to lighting. It’s about building light, not just placing it. You can fine-tune the contrast and the overall feel of the image, moving beyond a basic portrait to something that feels more crafted and intentional. This level of control is what separates amateur shots from professional ones.
This method is also super practical. It doesn't require a massive studio space, and the gear isn't overly complicated. You can achieve a wide range of looks, from soft and flattering to more dramatic, all with just two lights. It’s a solid foundation for any headshot photographer wanting to produce consistent, high-quality results. For a good starting point on lighting techniques, exploring natural open shade lighting can offer some foundational ideas that translate well into studio setups.
Essential Gear: What You Need to Build a Reliable 2 Light Setup for Headshots
Alright, so you're looking to step up your headshot game with a two-light setup. It’s not as complicated as it sounds, and you don't need a whole warehouse full of gear to get started. The goal here is to get that polished, professional look that clients expect.
First off, you'll need your lights. Most people start with strobes, but speedlights can work too, especially if you're just beginning or shooting in smaller spaces. You'll want at least two of these. Think of them as your main light and your fill light. We'll get into positioning them later, but having two gives you way more control than just one.
Next up, modifiers. These are super important for shaping your light. Softboxes are a popular choice because they create a soft, flattering light. Strip boxes are great for adding a nice edge light, sometimes called a kicker, which can really make a subject pop from the background. Grids are also handy for controlling light spill. You don't need every single type, but having a couple of different options will give you flexibility.
Beyond the lights and modifiers, you'll need light stands. Sturdy ones are key, especially if you're using larger modifiers or shooting in a place with a breeze. You'll also want some way to trigger your lights, whether that's a wireless trigger system or a sync cord. Don't forget a reflector, too. Even with two lights, a simple reflector can bounce light back into the shadows and make a big difference.
Building a solid lighting kit doesn't mean emptying your bank account. Start with the basics and add pieces as you grow. The right gear, used thoughtfully, is what makes the difference between a snapshot and a professional portrait.
Here's a quick rundown of what you'll likely need:
Two light sources: Strobes or powerful speedlights.
Light stands: At least two, preferably sturdy ones.
Modifiers: A softbox for your key light, and maybe a strip box or grid for your second light.
Wireless triggers: To fire your lights remotely.
Reflector: A simple 5-in-1 reflector is super versatile.
Getting the right equipment is the first step towards creating those professional studio looks. You can find a lot of helpful information on building your studio space and choosing gear in this comprehensive guide.
Remember, the gear is just a tool. Learning how to use it effectively is where the magic happens. So, gather your kit, and let's move on to how to position those lights.
Key Light Positioning: How to Place Your Main Light in a 2 Light Setup for Headshots
Alright, let's talk about the main light, or the key light as we call it. This is the big player, the one doing most of the heavy lifting in your headshot setup. Getting this one right is pretty much half the battle.
Think of it as the primary source of illumination for your subject's face. Its position dictates the overall mood and shape of the light on the face. You've got a few common spots to start with, and they all give a slightly different feel.
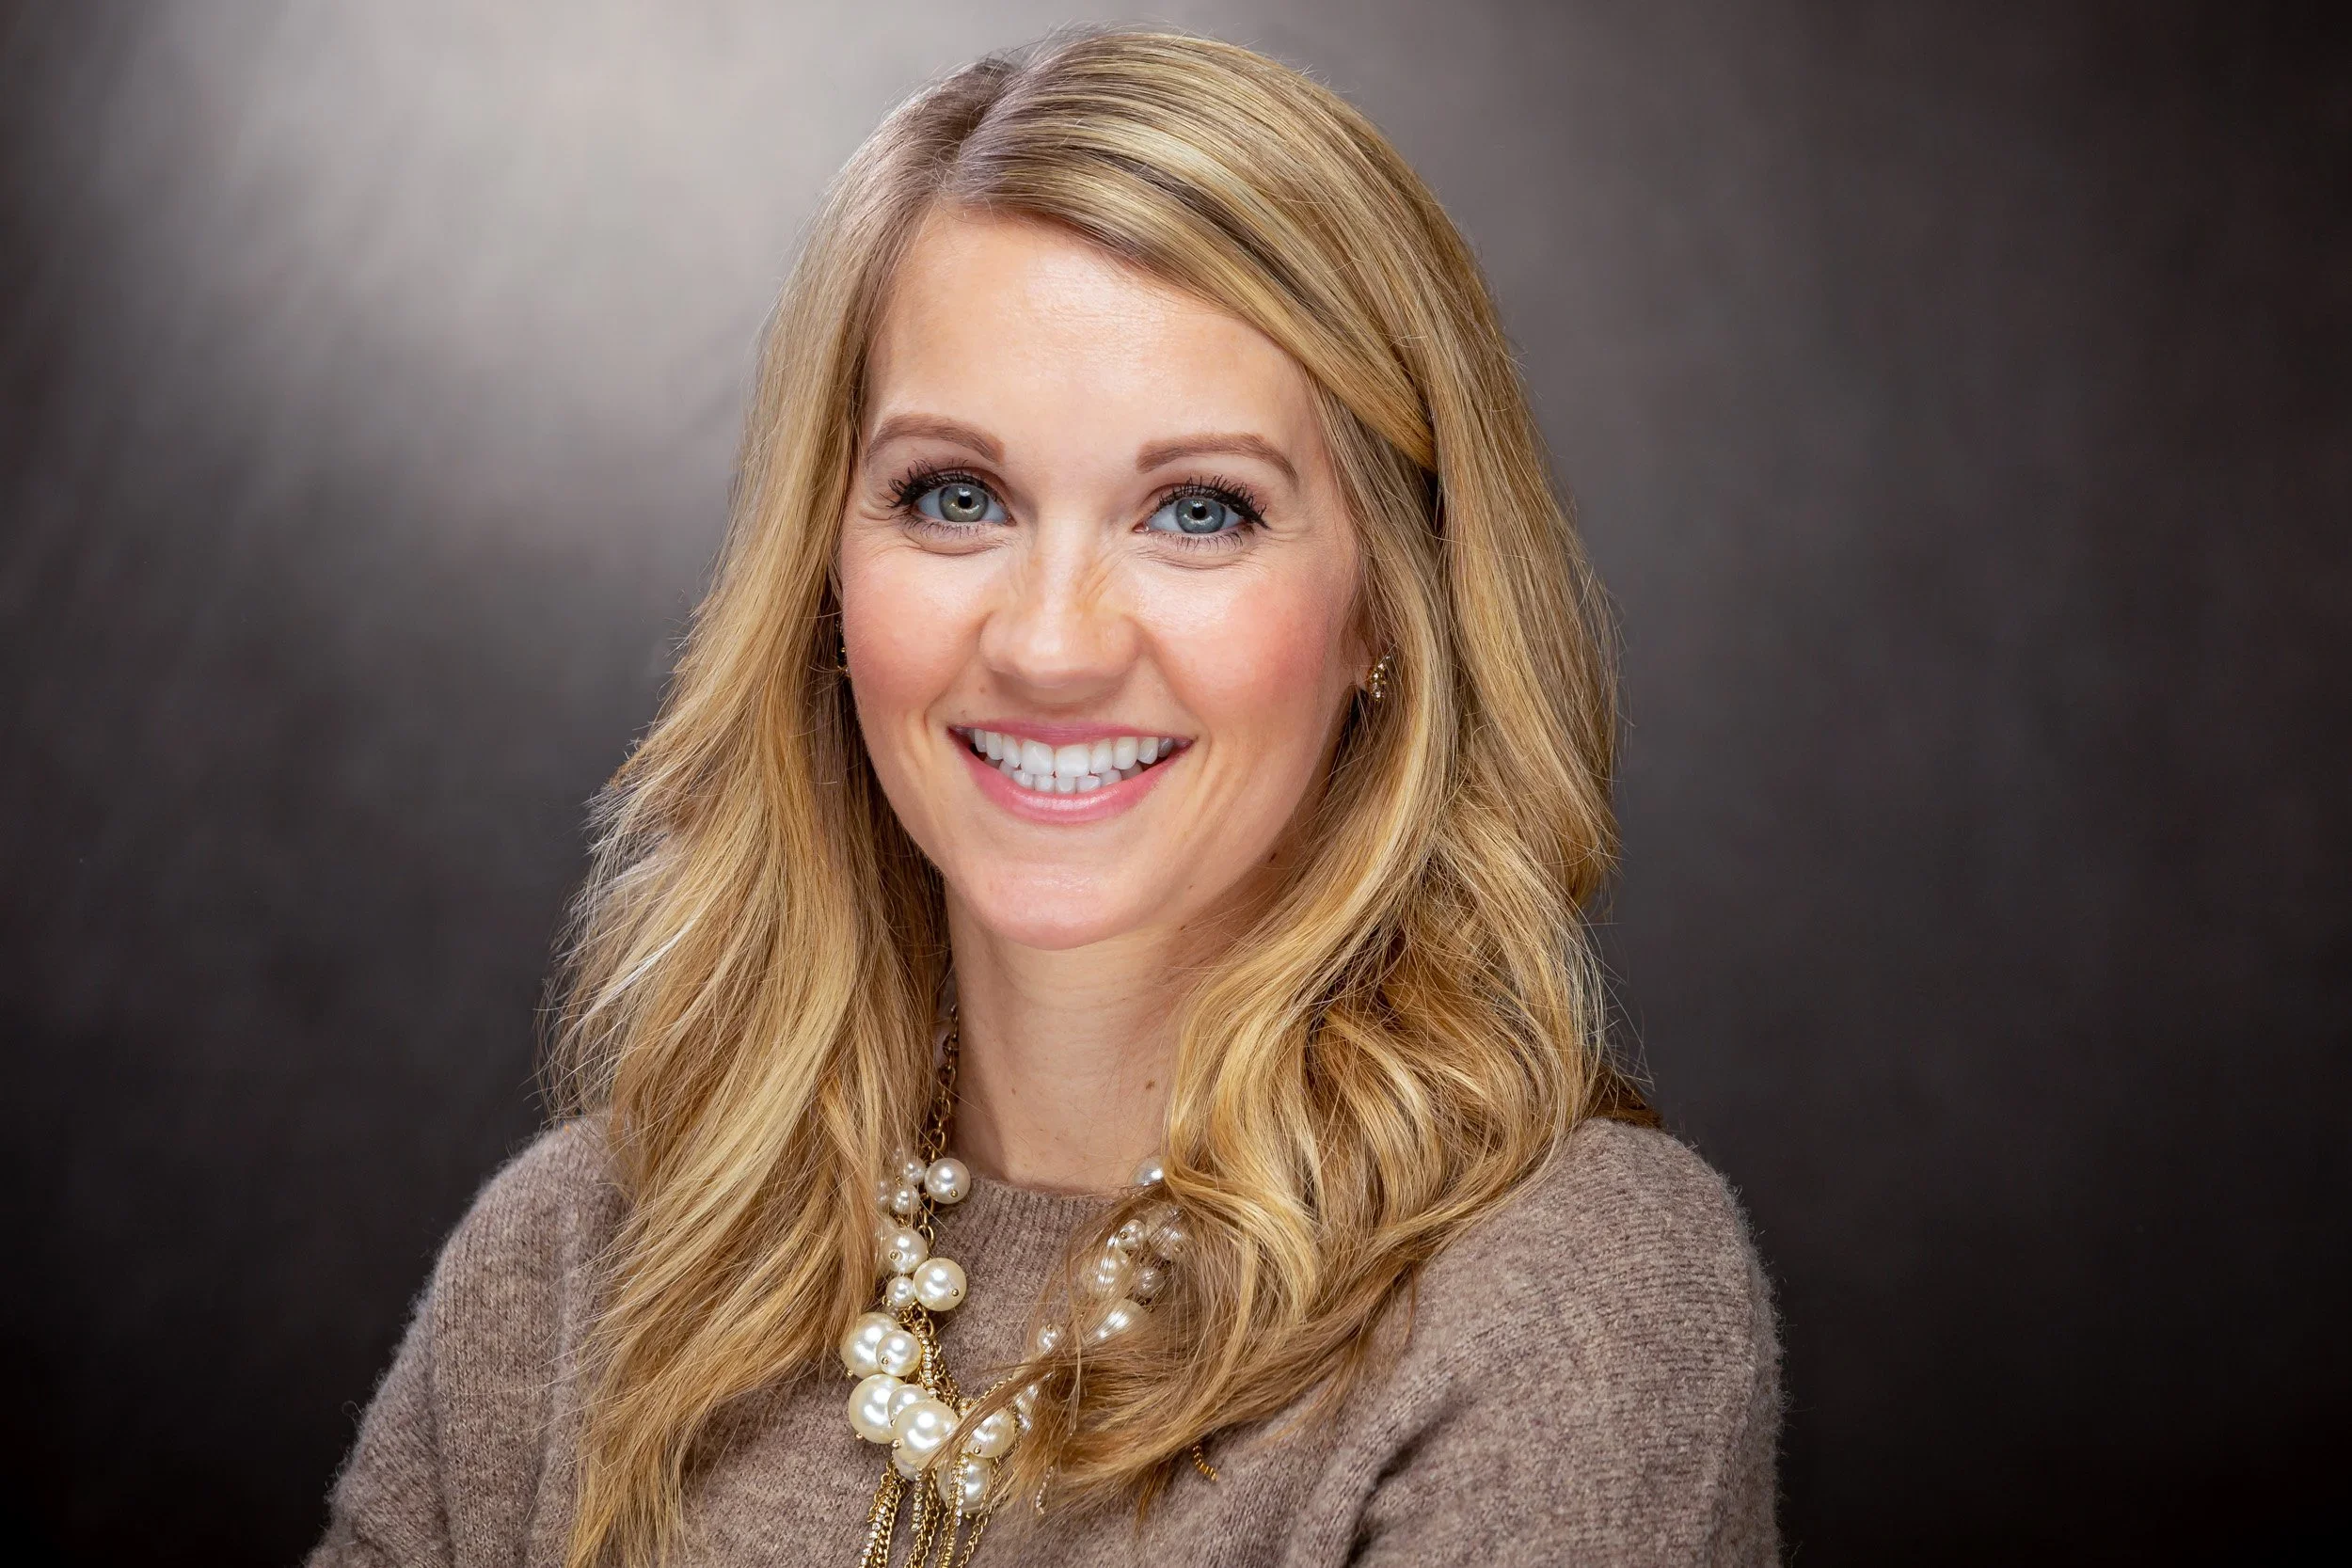
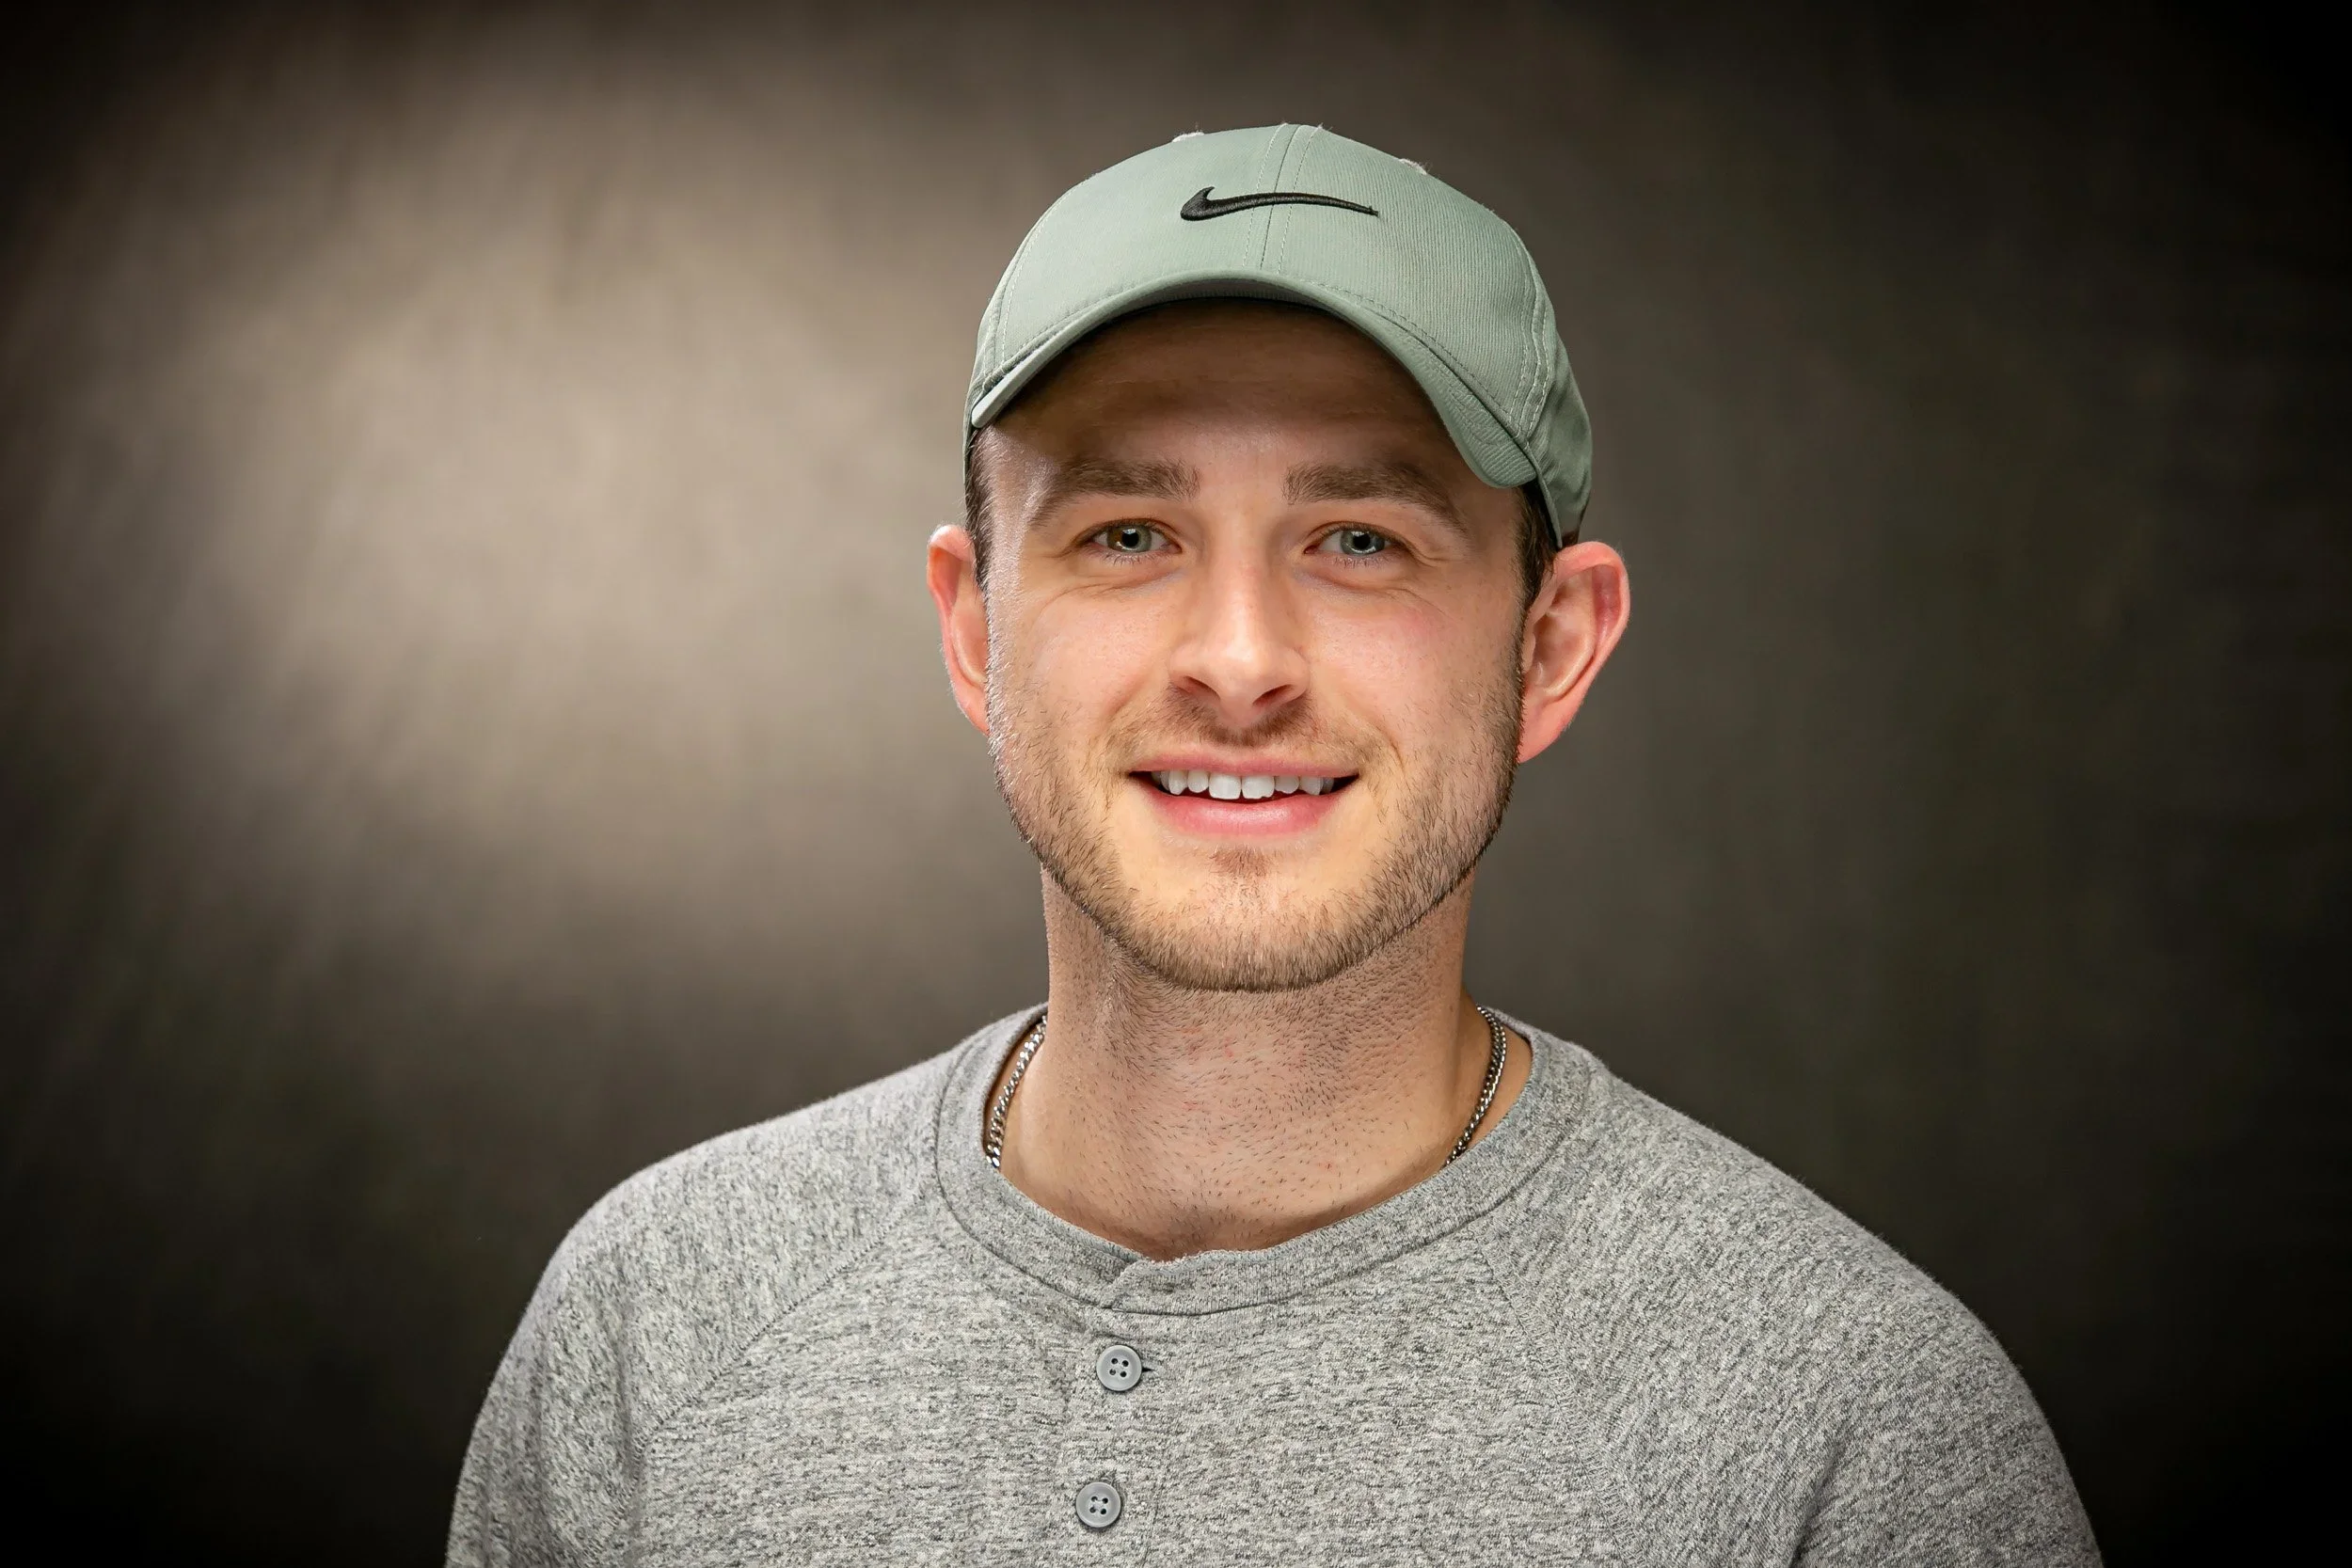
45-Degree Angle: This is a classic for a reason. Place your key light about 45 degrees to the side of your subject and roughly at eye level or slightly above. This creates nice, natural-looking shadows that define the facial structure without being too harsh. It's a go-to for a reason.
Broad Lighting: If you want to make a face look wider, or if your subject has a narrower face, try broad lighting. This means positioning the key light so it illuminates the side of the face that's turned towards the camera. The shadows will fall on the side of the face turned away. It's a bit more dramatic.
Short Lighting: The opposite of broad lighting. Here, the key light illuminates the side of the face turned away from the camera. This creates more shadow on the side facing the camera, which can be really flattering for slimming down a rounder face or adding a bit of mystery.
The exact height and angle of your key light will change based on the subject's face shape and the look you're going for. Don't be afraid to move it around. Sometimes just an inch or two makes a big difference.
When you're positioning the key light, pay close attention to the catchlights in your subject's eyes. These little reflections tell you where the light source is and if it's creating a pleasing sparkle. You want those catchlights to be visible and well-placed, usually in the upper part of the iris, to make the eyes look alive.
Here's a quick rundown of common positions and their effects:
| Light Position Relative to Camera | Shadow Side of Face | Common Effect |
|---|---|---|
| 45° Left or Right | Opposite the light | Balanced look with well-defined facial features |
| More Toward Camera (Broad Light) | Away from camera | Wider facial appearance with softer shadows |
| More Away from Camera (Short Light) | Toward camera | Slimming effect with deeper, more dramatic shadows |
Fill Light Techniques: Balancing Shadows in a 2 Light Setup for Headshots
So, you've got your main light set up, and it's doing a pretty good job of lighting up your subject's face. But if you look closely, you'll notice those shadows. They're not necessarily bad, but sometimes they can be a bit too dark, making the photo look harsh or unbalanced. That's where the fill light comes in. Its job is to gently lift those shadows, making the overall image softer and more pleasing.
The goal isn't to eliminate shadows, but to control them. Too much fill light can flatten the face, making it look like it's under a harsh midday sun, and nobody wants that. You want to maintain some sense of dimension and shape.
There are a couple of ways to handle this fill. The most common method is using a reflector. It's simple, cheap, and effective. You just place it opposite your main light source, angled to bounce some of that light back into the shadow areas. You can use a white reflector for a softer fill, or even a black one if you want to deepen shadows for a more dramatic look. Adjusting how close the reflector is to your subject will change how much light it bounces back.
Here's a quick rundown of reflector placement:
Under the chin/mid-chest: This is a classic spot. It fills in the shadows under the nose and chin, and often adds a nice catchlight to the eyes.
Opposite the main light: This is your go-to for balancing the overall light on the face.
Slightly angled: Don't just point it straight at the subject. Angle it so it bounces light back into the shadows without creating a second, competing light source.
If you're using a second light as your fill, you'll want to keep its power much lower than your key light. Think of it as a gentle whisper of light, not a shout. You can also use modifiers like softboxes or umbrellas on your fill light to make it even softer. A common setup is to have the fill light positioned closer to the camera axis than the key light, and at a lower power setting. This helps to soften portrait lighting without losing the shape of the face.
When you're adjusting your fill, pay attention to the contrast. You're looking for a balance that feels natural and flattering. It's a bit of an art, and it often comes down to what looks good for the specific person you're photographing. Don't be afraid to experiment with different positions and power levels until you get it just right.
Remember, the fill light is your friend in controlling contrast. Whether it's a simple reflector or a second light, using it thoughtfully will make a big difference in the professional quality of your headshots.
Lighting Ratios: Achieving the Right Contrast in a 2 Light Setup for Headshots
So, you've got your key light and your fill light set up. Now what? It's all about the balance, or what we call the lighting ratio. This is basically the difference in brightness between the light hitting the side of your subject's face that's closest to the light (the highlight side) and the side that's further away (the shadow side). Getting this right is what separates a flat, boring photo from one with depth and dimension.
Think of it like this: a higher ratio means more contrast, with brighter highlights and darker shadows. A lower ratio means less contrast, with softer shadows and a more even look. For professional headshots, you're usually aiming for something in the middle, but there's room to play.
Here's a general idea of what different ratios can do:
1:1 (Even Lighting): This is the lowest contrast. Both sides of the face are lit almost equally. It's clean and simple, often used for a very open and friendly look.
2:1: A slight increase in contrast. The shadow side is noticeably darker, but still has detail. This is a very common and pleasing ratio for many headshots.
4:1: More dramatic. The shadows are deeper, creating more mood and shaping the face more strongly.
8:1 and higher: High contrast. This creates very deep shadows and strong highlights, often used for a more artistic or intense look. Be careful with this for standard headshots, as it can hide detail.
The key is to adjust the power of your fill light (or move your reflector closer or further away) to control how much light fills in those shadows. You're not trying to eliminate shadows, but rather to shape them so they add to the portrait, not detract from it. It's a bit of an art, and you'll learn to see what looks good with practice.
How do you actually measure this? While pros might use light meters, for most of us, it's about visual judgment. Start with your key light. Then, bring in your fill light or reflector. Watch how the shadows change. Does the shadow side look too dark and muddy? Bring the fill light closer or increase its power. Is the shadow side too bright, almost as bright as the highlight side? Move the fill light further away or decrease its power. The goal is to create a pleasing shape and depth on the face without losing important details in the shadows.
Background and Separation: Using a 2 Light Setup for Headshots to Add Depth
So, you've got your key and fill lights dialed in, making your subject pop. But sometimes, they can look a little... flat against the background, right? That's where a third light, or even just a smart use of your existing two, comes into play to add some serious depth. We're talking about separating your subject from whatever's behind them, making them the undeniable star of the shot.
Think of it like this: a plain wall can be okay, but a background that has a subtle gradient or a gentle highlight can really make your subject stand out. This is often achieved with a "hair light" or "rim light." This light usually comes from behind your subject, often off to one side, and it catches the edge of their hair or shoulders. It creates a thin, bright line that visually lifts them off the background. This is especially effective with darker hair or darker clothing, where the contrast is needed most.
Here are a few ways to think about using your lights for separation:
Rim Light: Position a light behind and to the side of your subject. A strip box or a light with a grid works well here to keep the light focused and prevent it from flaring into the lens. This is great for defining the jawline on men or adding sparkle to hair.
Background Light: If you're using a plain backdrop, you might want to light it separately. You can place a light directly behind your subject, aimed at the backdrop. This allows you to control the brightness of the background independently, making it lighter or darker as needed.
Using Existing Lights Creatively: Sometimes, you can bounce your fill light slightly towards the background, or adjust the angle of your key light so a bit of spill hits the background, creating a subtle gradient. It's all about playing with the light you have.
The goal here isn't to blast the background with light, but to add just enough separation so your subject feels three-dimensional. Too much background light, and it becomes distracting. Too little, and they might blend in.
Consider the background itself. Is it a solid color? A textured surface? The type of background will influence how you approach adding depth. For a plain studio backdrop, a dedicated background light is often the best bet. For more environmental shots, you might rely on the natural light falling on the background or use your fill light to subtly brighten a specific area behind your subject.
Common Mistakes to Avoid When Using a 2 Light Setup for Headshots
So, you've got your two lights ready for some headshots. Awesome! But before you start clicking away, let's talk about a few things that can trip you up. It's easy to get excited and just start placing lights, but a little bit of awareness goes a long way.
One of the biggest pitfalls is not paying attention to the light's intensity. You might have your key light set up perfectly, but if your fill light is too strong, it can flatten out the image completely. You lose all that nice dimension and texture. The goal is to shape the face, not erase the shadows. Think of the fill light as a gentle whisper, not a shout. It should just lift the shadows enough to reveal detail, not eliminate them.
Another common issue is incorrect light placement, especially with the fill light. If it's too high or too low, it can create weird, unnatural shadows. For a classic look, the fill light usually sits lower than the key light, or at least at the same level, to mimic ambient light. Messing this up can make your subject look a bit strange, like they have a shadow coming from the wrong direction.
Here are a few more things to watch out for:
Ignoring the light ratio: This is huge. If your fill light is too close in power to your key light, you'll get a very flat, uninteresting look. Too much difference, and you might end up with harsh shadows that are hard to recover. You need a balance.
Flare and lens contamination: If your lights aren't controlled, they can bounce around and hit your lens directly, causing flare. This washes out your image and kills contrast. Using flags or positioning your lights carefully can prevent this.
Not considering the subject's features: What works for one person might not work for another. Deep-set eyes might need more light from the fill, while a double chin might require adjusting the key light's height. Don't just stick to a formula without looking at the person in front of you.
It's really about observation. Look at the shadows, look at the highlights, and see how the light is interacting with your subject's face. Don't be afraid to move things around, even just a little bit. Small adjustments can make a big difference in the final look of your headshots.
Finally, don't forget about the background. Sometimes, people get so focused on the subject's face that they forget the background can add or detract from the overall professional look. If your background lights are too strong, they can pull attention away from your subject. If they're too weak, the background might look muddy. Getting the lighting on the background right is just as important as lighting the face.
Creative Variations: Advanced Ways to Enhance Your 2 Light Setup for Headshots
So, you've got the basic two-light setup down pat. Nice! But what if you want to push things a little further, make your headshots really stand out from the crowd? Don't just stick to the same old thing every time. There are plenty of ways to tweak and play with your lights to get different looks.
One simple trick is to change the type of modifier you're using on your lights. Instead of just softboxes, try a strip box for your key light. This gives you a long, thin highlight that can look really dramatic, especially on the jawline or hair. Or, for a more focused, punchy look, you could use a grid on your key light to narrow the beam and create more defined shadows. It’s all about controlling where that light goes.
Another thing to experiment with is the position of your second light, often called the kicker or rim light. Instead of just placing it behind and to the side, try moving it further back or even slightly above. This can create a really nice separation from the background, especially if your subject has darker hair or you're shooting against a dark backdrop. It adds a subtle edge light that makes the subject pop.
Here are a few ideas to get you started:
Hair Light: Add a third, smaller light aimed directly at the back of your subject's hair. This is great for adding a highlight, especially on darker hair, and really makes it shine.
Background Light: Use a separate light to illuminate your background. You can make it a solid color, create a gradient, or even just add a subtle glow behind your subject to give the image more depth.
Color Gels: Don't be afraid to put colored gels on your lights. A subtle blue gel on the background light can add a cool mood, or a warm gel on your key light can give a more inviting feel.
Sometimes, the smallest adjustments make the biggest difference. Don't be afraid to move your lights just a few inches or change the angle slightly. Watch how the shadows shift and how the highlights fall on your subject's face. It's a process of discovery, and you'll learn a lot by just playing around.
Think about the mood you want to create. Do you want something soft and dreamy, or sharp and dramatic? Your two-light setup is more versatile than you might think. With a few simple changes, you can go from a standard studio look to something much more artistic and unique.
Want to make your headshot photos even more amazing with just two lights? We've got some cool tricks up our sleeves! Discover creative ways to make your shots pop and look super professional.
Frequently Asked Questions
-
Using two lights for headshots helps create a more professional and polished look, similar to what you'd see in a studio. One light acts as the main source, shaping the face, while the second light adds depth or separates the subject from the background, giving your photos a richer, more dimensional feel.
-
You can use various lights, like studio strobes or even speedlights (the small flashes that attach to cameras). The key is to control the light. Using modifiers like softboxes or grids helps soften the light and direct it where you want it, preventing harsh shadows or unwanted glare.
-
The main light, often called the 'key light,' is usually placed to the side of the camera and slightly above the subject's head. This position helps create nice shadows that define the face's shape, making it look more interesting and sculpted. Think of it like drawing with light!
-
The second light, often called a 'fill' or 'kicker' light, does a couple of things. A fill light softens the shadows created by the main light, making the overall image brighter and less contrasty. A kicker light, placed behind and to the side of the subject, adds a thin line of light on the hair or jawline, helping the person stand out from the background.
-
This is about 'lighting ratios.' It means controlling how much brighter your main light is compared to your fill light. You can adjust this by changing the power of your lights or moving them closer or further away. A good starting point is to have the main light slightly stronger than the fill light for a natural look.
-
Absolutely! One of the lights can be used to light up the background, making it a solid color or adding a subtle gradient. This helps your subject pop out from the background, creating a cleaner and more professional look that's perfect for professional portraits.